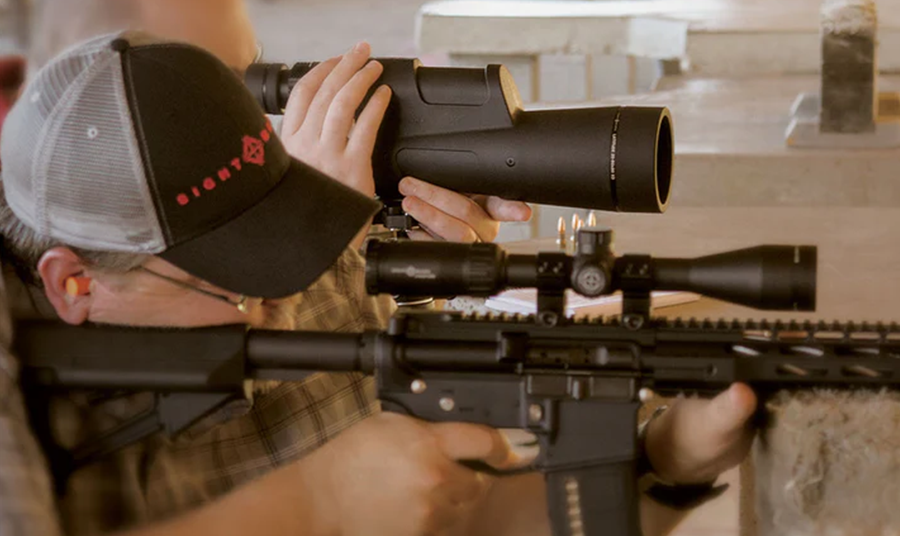
So you’ve got a buddy behind the rifle and a target way out there past the berm, let's say 500 yards. You happen to have your new handy-dandy spotting scope, but you're not really sure how to use it. You might be tempted to just zoom in and call out "hit" or "miss" as needed, but there's more to spotting than just calling hits. You need to know how to position yourself, communicate with your shooter, and understand what he needs at that moment.
As a matter of fact, as the spotter, you can make or break the shot, and that's why people shell out the big bucks for good spotting scopes.
Why You Need a Spotting Scope at the Range
Sure, most shooters today run rifles with decent magnified optics. But even the best rifle scopes have limitations. They’re usually zoomed in too tight to give a good picture of the environment, and their field of view is much smaller than a spotting scope’s. Spotting scopes are built for one thing: observation. You get a clearer view, a wider angle, and the ability to stay locked on target while your shooter resets, reloads, or adjusts.
Spotting scopes also give you a steadier image at higher magnifications. For enhanced accuracy, a rifleman puts his rifle on a stable platform like a shooting bag, tripod, or bipod. In the same way, since spotting scopes have such high magnification—even at their base power—a spotter also puts his spotting scope on a stable platform. Any tiny movement or shake gets amplified, making your scope picture jump or blur. A stable tripod keeps your view steady and focused, which is critical when you're trying to track bullet trace or call precise impacts. You can track bullet trace, call impacts, and guide your shooter in with real-time corrections.
How to Spot Shots and Call Corrections
As a spotter, your job is to relay information back to the shooter so he can make the appropriate corrections for a more accurate shot. You’ll call hits or misses, but more importantly, you’ll give direction. That starts with reading the wind.
To estimate wind speed, spotters look for environmental cues: mirage patterns, moving grass, leaves, dust, or smoke. You can also use handheld anemometers, but when those aren't available, mirage is often the most reliable indicator. If the shimmer of the air (mirage) is moving steadily from left to right and at a moderate pace, you might estimate the wind to be at around 5 to 8 mph.
Once you have a wind speed estimate, you can translate it into a correction using ballistic charts or a dope card specific to the shooter's rifle and ammo. For example, a 10 mph full-value crosswind (directly from the side) at 500 yards might push a .308 bullet about 0.7 mils off target. As a spotter, you’d tell the shooter, "Hold 0.7 mils into the wind." The shooter should then adjust their aim point 0.7 mils into the direction the wind is coming from. If the wind is coming left to right, that means holding 0.7 mils to the left of the target. They can either dial the correction into their scope or hold off using the reticle's subtensions, depending on their preference and the type of shot.

But what if you're wrong? If the round hits off target in a way you didn’t expect, reassess your environment quickly. Maybe the wind shifted or wasn’t as strong as you thought. If the impact lands too far right, the wind may have let up—try dialing back your correction. If it lands left, you probably underestimated the wind—add more hold into it. Communicate clearly and adjust fast. For example: "Scratch that—wind’s stronger than expected. Go to 0.9 mils left," or, "Wind dropped—adjust to 0.4 mils." Good spotting is about staying responsive and reading the environment in real time.
Different directions require adjusting the value of the wind: wind at a 45-degree angle is about 75% effective, while wind from behind or directly in front has minimal effect. With experience, spotters learn to blend their field observations with ballistic knowledge to give fast, accurate calls.
From there, you also make other types of corrections:
- Wind calls: Estimate the wind speed and direction, and let the shooter know how it might push the bullet. For example, you might say, "Wind is coming left to right at about 8 mph, hold 0.6 mils left." If the wind picks up mid-string, you might adjust on the fly with something like, "Wind's picking up, bump it to 0.8 mils."
- Corrections: If a shot misses, call the adjustment in clear and precise terms. For instance, "Impact was 0.5 mils low and 0.2 left. Hold high right," or "You’re two inches high, dial down a click or two."
- Spotting trace: If you can see the bullet's vapor trail, follow it all the way to the target. You might say, "Saw trace arcing just over the right edge of the target, try holding a tenth more left," or, "Trace was low all the way in—add elevation." Even if you can't see the impact, the trace helps guide adjustments.
Good spotters keep calm, communicate clearly, and focus on consistency.
Do You Need a Spotting Scope with a Reticle?
Not all spotting scopes are the same. Some, like the Sightmark Latitude 15-45x60, offer crystal-clear views but no reticle. These are great for general observation, wildlife spotting, and calling shots when you're working in close coordination with someone using a reticle-equipped rifle scope.
Others, like the Latitude 20-60x80 XD, do come with a reticle. This lets spotters make precise calls using the same units the shooter is seeing in their own optic – typically in MILs or MOA. If you're working as part of a team or trying to train new shooters, a reticle in your spotter scope can make communication a lot more efficient.
So which one do you need? If you're guiding a shooter who already knows how to interpret your calls and you're focused on clarity and field of view, the 15-45x60 is a solid pick. But if you're doing long-range precision work and need to make exact holds or corrections, that 20-60x80 with the reticle might be worth the upgrade.
How to Set Up a Spotting Scope
Setting Up at the Range
- Use a stable tripod: Get something solid with adjustable legs so you can set it up comfortably next to your shooting bench or mat.
- Position at eye level: You shouldn’t have to crouch or stretch. Adjust the tripod and eyepiece angle so you can maintain a steady view.
- Shade matters: Use a sunshade or sit under cover to reduce glare and eye strain. It helps your image stay sharp.
- Zero your view: Aim at the same target as the shooter and keep your magnification appropriate for the distance. Don’t max it out unless needed—you want clarity, not just zoom.
Using a Spotting Scope in the Field
- Go low-profile: Keep your tripod legs short and sit or lie down to stay hidden.
- Use natural cover: Bushes, rocks, or terrain features help hide your position while giving you a stable platform.
- Scan first: Before your shooter takes a shot, use the spotting scope to glass the area. Look for wind indicators, terrain features, and potential backstops.
- Adjust as needed: In hilly or brushy terrain, you might need to raise or shift your scope to maintain a clear view.
Whether you're calling shots from the bench or scanning a distant ridge, knowing how to use a spotting scope is what separates a guess from a confirmed hit. Learn the skill, get the right scope, and become the teammate every shooter wants. Explore Sightmark’s lineup of spotting scopes to find the one that fits your mission.
Frequently Asked Questions
Why do shooters use spotting scopes at the range?
Shooters use spotting scopes at the range because they provide a clearer view, wider angle, and the ability to stay locked on target while the shooter resets, reloads, or adjusts.
How can a spotting scope help improve accuracy?
A spotting scope can help improve accuracy by providing a steadier image at higher magnifications, allowing the spotter to track bullet trace, call impacts, and guide the shooter in with real-time corrections.
What environmental cues can spotters look for to estimate wind speed?
Spotters can look for mirage patterns, moving grass, leaves, dust, or smoke to estimate wind speed. Mirage is often the most reliable indicator when other tools like handheld anemometers are not available.
How can a spotter help the shooter make corrections for windage?
A spotter can help the shooter make corrections for windage by estimating wind speed, translating it into a correction using ballistic charts or dope cards specific to the shooter's rifle and ammo, and instructing the shooter to hold a certain number of mils into the wind.
Why is it important for a spotter to have a stable platform for the spotting scope?
Having a stable platform for the spotting scope is important because any tiny movement or shake can be amplified at high magnifications, causing the scope picture to jump or blur. A stable tripod keeps the view steady and focused, which is critical for tracking bullet trace or calling precise impacts.